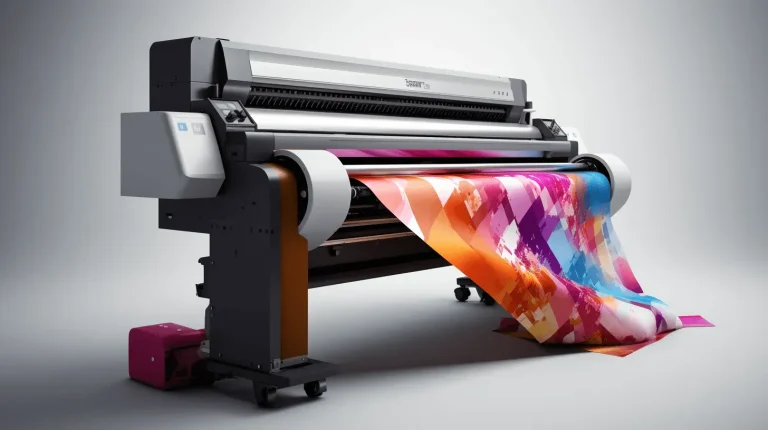
DTF transfers for custom apparel offer a flexible, vibrant option for designers and brands seeking bold, long-lasting graphics on a wide range of fabrics. Known as direct-to-film printing, or DTF printing, this method prints onto a release film and uses a powder adhesive to bond designs during heat pressing. With DTF printing, you can achieve rich color, fine detail, and smooth gradients on cotton, blends, and synthetics, expanding your custom apparel printing options. Careful selection of materials and a precise heat-press process ensure DTF transfer durability, making designs withstand multiple washes. Mastering the workflow—from design to applying DTF transfers with heat press to finishing—unlocks fast, cost-effective creativity.
Described using alternative terms, this technology is often referred to as film-based color transfer or pigment film printing for textiles, offering a similar high-impact result without the need for screen setups. The workflow can be described as a direct-to-film creation process, where artwork is prepared digitally and translated to wearable fabric via an adhesive-coated film. This approach, commonly called heat-press transfer on fabrics, emphasizes durability, wash-fastness, and a soft hand, while remaining compatible with cotton, blends, and performance fabrics. In practice, the system relies on calibrated printers, PET release films, and precise heat-press parameters to ensure the final designs adhere cleanly and stay vibrant over time.
DTF transfers for custom apparel: unlocking vibrant, durable designs
DTF transfers for custom apparel enable designers to apply full-color artwork to a wide range of fabrics using direct-to-film printing. The process begins with printing on a PET release film with pigment inks, followed by a powder adhesive and curing to create a transferable image. This approach is a core option in custom apparel printing because it supports intricate details, smooth gradients, and broad fabric compatibility.
When executed correctly, DTF transfers for custom apparel deliver bold color fidelity and a soft hand feel, making them suitable for a variety of garments—from cotton tees to blends and certain synthetics. The combination of vibrant results and practical workflow also supports small runs and prototypes without the high setup costs associated with some traditional methods. DTF transfer durability improves with proper curing and careful post-press care, ensuring designs endure regular laundering.
Mastering the process: applying DTF transfers with heat press for high-quality results
A practical workflow for applying DTF transfers with heat press starts with design and color management, then printing on release film via direct-to-film printing. After printing, a powder adhesive is applied and cured, the film is trimmed, and the design is positioned on the garment for pressing. This sequence—often referred to within DTF printing workflows—ensures a strong bond and accurate color transfer.
To achieve consistent outcomes, choose quality materials and maintain your heat press for even platen temperature and adequate pressure. Use compatible films, adhesive powders, and fabrics suitable for DTF printing, and follow the supplier’s pressing guidelines. By emphasizing proper curing and controlled environment, you maximize DTF transfer durability and ensure reliable custom apparel printing results across batches.
Frequently Asked Questions
What are DTF transfers for custom apparel, and how does direct-to-film printing work for small-batch runs?
DTF transfers for custom apparel involve printing a design onto a special release film using pigment inks, applying a powder adhesive, curing, and then transferring the image to fabric with a heat press. This direct-to-film printing approach delivers vibrant color, fine detail, and broad fabric compatibility, making it ideal for small-batch runs or prototypes. With proper curing and finishing, DTF transfer durability remains high through regular washing and wear, giving you durable, high-quality results.
How do you apply DTF transfers with a heat press to ensure durable results for custom apparel printing?
To apply DTF transfers with a heat press: pre-press the garment to remove moisture, position the transfer face-down, cover with a protective sheet, and press at the recommended temperature (usually about 300–320°F / 150–160°C) for 15–20 seconds with even pressure. Peel according to the film (cold, warm, or hot) and perform a post-press if recommended. For maximum DTF transfer durability, follow garment care instructions—wash inside-out in cold water, avoid bleach and high-heat drying, and air-dry when possible. This approach supports quality outcomes in custom apparel printing.
| Aspect | Key Points | Details |
|---|---|---|
| What are DTF transfers? | – Printed on PET release film with pigment inks; coated with a powder adhesive; cured and heat-transferred to fabric. – Vibrant color, fine details, and smooth gradients across many fabrics. – Suitable for small-batch runs, prototypes, and production. | DTF transfers are versatile and can be used on cotton, blends, certain synthetics, and performance materials, making them attractive for varied product lines. |
| Benefits | – Color vibrancy and detail; – Broad fabric compatibility; – No minimums and cost efficiency; – Soft hand feel; – Durability and washability. | DTF transfers deliver bright, durable designs without the setup costs of traditional methods, while preserving the garment’s feel. |
| Workflow overview | – Design & color management; – Printing on release film; – Powder coating; – Curing; – Cutting; – Backing, pressing & finishing | A structured pipeline ensures consistent color, adhesion, and alignment from design to finished transfer. |
| Materials & equipment | – Release film and PET substrates; – Powder adhesive; – Heat press; – Inks and pretreatment; – Curing supplies | Quality components and proper calibration of the printer, coating, and pressing equipment drive durability and color accuracy. |
| Design considerations | – Color management; – Resolution (at least 300 dpi); – Mirroring & layout; – Substrate compatibility | Prepare artwork with correct color profiles and ensure it will read correctly after transfer on the chosen fabric. |
| Step-by-step: applying with a heat press | – Prepare garment; – Position transfer; – Cover and apply heat; – Peel & finish; – Post-press care | Follow supplier guidelines for temperature (often around 300–320°F / 150–160°C), time (15–20s), and pressure for best results. |
| Care & durability | – Wash inside out in cold water; – Avoid harsh bleach and high heat; – Air-dry or low-heat; – Store away from direct sun; – Follow transfer supplier care instructions | Proper care preserves color, adhesion, and flexibility over many washes. |
| Troubleshooting | – Peeling/adhesion issues; – White halos; – Faint colors or color bleeding; – Stiff hand; – Residue on garment | Identify root causes (pre-press, curing, or ink issues) and adjust temps, pressure, or curing steps as needed. |
| Tips for success | – Run small tests on common fabrics; – Control environment (humidity/temperature); – Build templates and color profiles; – Document press settings; – Source from reputable suppliers | A well-organized workflow reduces variance and speeds production while maintaining quality. |