DIY T-Shirts with DTF transfers present a practical, budget-friendly approach to expanding your product line. Direct-to-film transfers let you print vibrant designs on demand, with less setup complexity than traditional screen printing, making it a solid choice for micro-businesses, hobbyists, and startup shops. By embracing a DIY workflow, you can control costs while delivering durable, wash-ready graphics. To keep quality consistent, pay attention to print settings, fabric compatibility, and post-transfer curing. In practice, you’ll consider DTF transfer cost, assess a DTF printer for DIY shirts, and confirm how a heat press for DTF supports reliable, budget-friendly t-shirt printing.
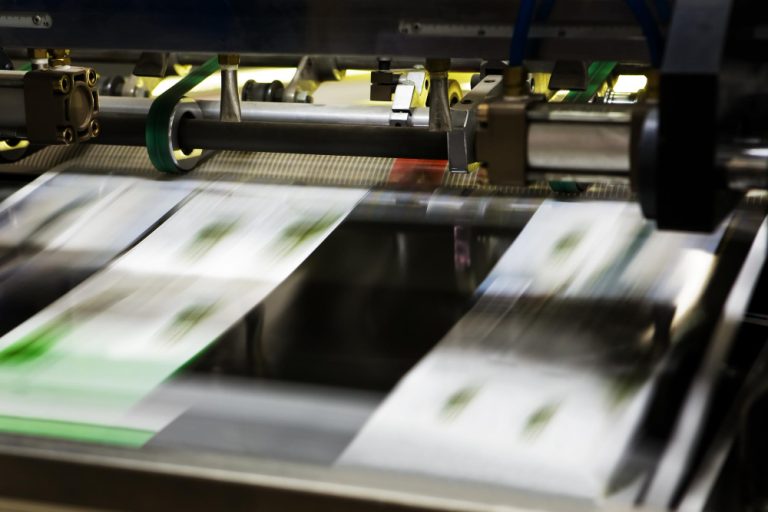
Equivalently, this approach centers on on-demand garment decoration using film-based transfer technology, commonly referred to as direct-to-film application. Picture designs digitally printed on a special film and then fused to fabric with heat, delivering vivid color and a soft hand. For makers seeking scalable solutions, the method supports low minimum orders and flexible batch sizes within budget-conscious t-shirt printing workflows. As you evaluate equipment and materials, consider how a reliable DTF system, paired with a compact heat press for DTF, can deliver consistent results without inflating upfront costs.
DIY T-Shirts with DTF transfers: Budget-Friendly Path to Custom Apparel
DIY T-Shirts with DTF transfers offer a scalable, budget-conscious entry into custom apparel. The on-demand nature of DTF transfers reduces setup time and upfront risk, letting a small shop or side hustle start with a modest selection of designs while still delivering vibrant results. This approach aligns with budget-friendly t-shirt printing, empowering you to test concepts, fulfill micro-orders, and grow as demand expands.
To maximize value, plan a budget-friendly setup that covers design, printing, transfer, and finishing. Focus on a printer capable of white ink, a compatible heat press for DTF, reliable transfer film, adhesive powder, and space for curing. While the initial investment varies, the ongoing per-shirt cost often decreases with volume, enabling competitive pricing and healthy margins over time.
Choosing the Right Equipment and Workflow for DTF Success
Selecting the right tools starts with the DTF printer for DIY shirts. Look for a model that handles CMYK plus white, supports the film, and pairs with dependable ink and software. Add a heat press for DTF that maintains consistent temperatures, along with DTF film, adhesive powder, and curing space. Balancing these components helps you manage DTF transfer cost while delivering durable, high-quality prints.
A streamlined workflow is essential for consistent results. Create a design file with scalable artwork, then print on DTF film using correct color settings, apply the adhesive powder, cure, and transfer with the heat press at manufacturer-recommended temperatures. Use color management software or RIP tools to maintain consistency across runs, and test on different fabrics to dial in prep and curing times for budget-friendly t-shirt printing that still looks premium.
Frequently Asked Questions
What is the typical cost to start DIY T-Shirts with DTF transfers, and how does the DTF transfer cost break down?
Starting a DIY T-Shirts with DTF transfers workflow requires a budget for a printer with white ink, a heat press, transfer film, adhesive powder, curing space, and design software. The upfront investment is typically a few thousand dollars for a practical setup. Ongoing DTF transfer cost per shirt includes ink, film, and powder, with per unit costs decreasing as volume increases. To keep costs manageable, consider refurbished equipment, buying consumables in bulk, batching design work, and documenting a repeatable workflow. This approach aligns with budget-friendly printing for small shops and side hustles.
What features should I look for in a heat press for DTF and how can I build a budget-friendly setup for DIY T-Shirts with DTF transfers?
For DIY T-Shirts with DTF transfers, choose a heat press that provides even pressure and reliable temperature control, ideally up to about 160–170 C, with a transfer time around 15–25 seconds. A swing away or clamshell design works well, and a sturdy model helps consistency. Pair the heat press with a DTF printer for DIY shirts that can handle white ink plus CMYK, so you can deliver vibrant transfers. A budget-friendly setup also includes transfer film, adhesive powder, curing space, and software for design and color management, supporting budget-friendly t-shirt printing for small shops. With careful selection and testing on different fabrics, you can achieve quality results while controlling costs.
| Aspect | Key Points |
|---|---|
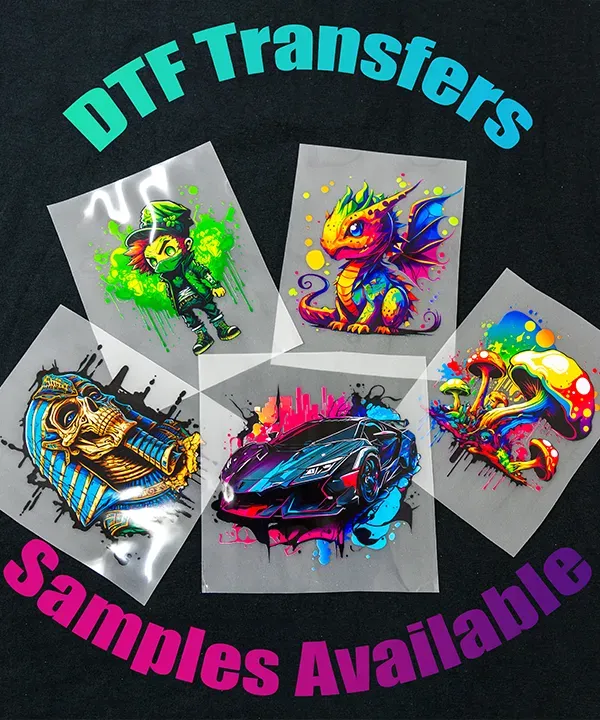
| What are DTF transfers? | DTF transfers involve printing an image onto film, applying adhesive powder, curing, and transferring with a heat press; results are durable and vibrant, offering a cost-effective alternative to traditional methods. |
| Why small shops love this method | Low setup costs, no large minimums, works with cotton, blends, and polyesters; flexible for micro-businesses, hobbyists, and startup shops. |
| Budget-Friendly Setup for Small Shops | Define a minimal viable setup: printer with white ink, heat press, transfer film, adhesive powder, curing space, software; starter cost often a few thousand; plan to scale later. |
| DTF printer for DIY shirts: What to look for | Look for a printer that handles white ink and CMYK; reliable ink; compatible adhesive powder; color management software; upfront cost higher but better print quality. |
| Components you’ll need | Printer with white ink capability; DTF film/transfer film; Adhesive powder; Heat press (swing-away or clamshell recommended); Weeding tools; Design/RIP software; Space for curing and finishing. |
| Step-by-step workflow | 1) Design and prep in Illustrator/Inkscape; 2) Print on DTF film using CMYK plus white; 3) Apply adhesive powder to film; 4) Cure the film; 5) Transfer to garment with heat press at recommended temp/time; 6) Peel and finish after cooling. |
| Cost considerations: DTF transfer cost and budgeting | Initial investment includes printer, ink, film, powder and consumables; per-shirt cost decreases with volume; plan ongoing costs (ink, film waste, powder) to price items with margins. |
| Quality, durability, and fabric compatibility | DTF offers strong wash durability and vibrant color; good on cotton/cotton blends; performance varies with polyester; optimize print resolution, color management, post-transfer cure; test shirts on different fabrics. |
| Tips for optimizing your budget-friendly setup | Start with reliable refurbished printer; buy consumables in bulk; batch design work; document workflow; balance automation with hands-on control. |
| Offerings, pricing, and branding | Budget setups can still offer premium-looking products; strong design, consistent transfers, careful branding; offer limited runs, custom orders; pricing should cover materials and labor; premium for rush orders. |
| Troubleshooting common issues | Uneven powder application; incomplete transfer; color bleeding or misalignment; white ink opacity on dark fabrics; peeling or cracking after wash. |
| Scaling from hobby to small business | Add a second heat press for parallel processing or upgrade to a larger-capacity printer; offer bulk orders or co-branded designs; plan for inventory, order management, and fulfillment. |
Summary
DIY T-Shirts with DTF transfers offer a practical gateway for small shops to enter the custom apparel market, delivering on-demand prints with relatively low upfront costs. This approach supports a budget-friendly setup, thoughtful workflow, and quality control, helping you build a scalable micro-business. By starting with a solid plan, testing across fabrics, and refining your process, you can offer durable, vibrant designs that stand out. With careful branding and strategic pricing, you can grow from hobby projects into a thriving line of DIY T-Shirts with DTF transfers that meet customer demand quickly and efficiently.